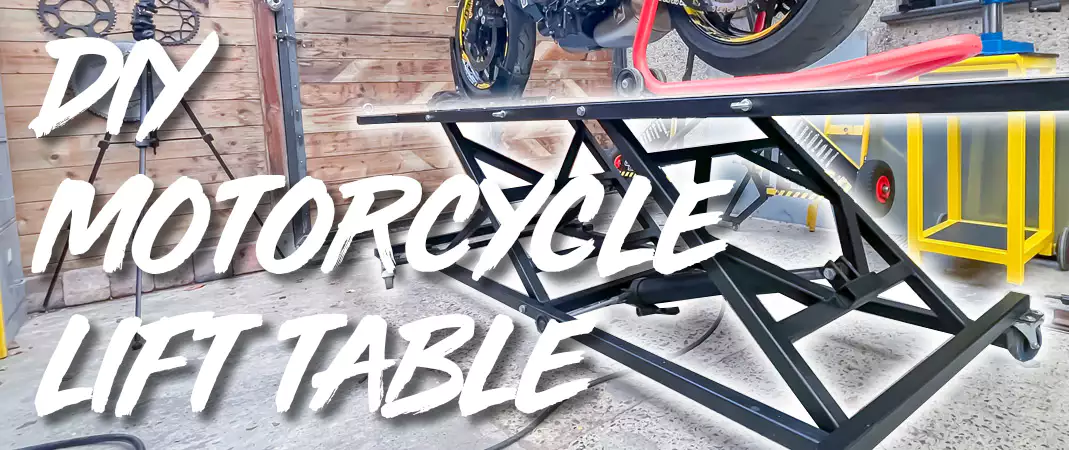
As a long-time motorcycle enthusiast, I always wanted a reliable lift table to make bike maintenance easier. However, quality motorcycle lifts can be quite expensive, so I decided to take on the challenge of building my own. Here’s a rundown of the design, materials, and features, along with some lessons learned along the way.
Design and Materials
After researching various designs online, I settled on a build that balanced functionality and simplicity. For the frame, I used 40x40x3mm steel profiles—these provide a solid structure, capable of lifting bikes up to 200kg. However, in retrospect, if I were to build this again, I’d go with profiles that have a 4mm or even 5mm wall thickness. This would add a bit more weight, but it would reduce the slight flex I noticed when lifting heavier bikes.
The lifting mechanism consists of a hydraulic cylinder paired with a pneumatic pump for ease of operation. This setup allows smooth and consistent lifting, and it’s easy to control. The lift table’s top plate is made of galvanized steel, which provides durability and resistance to wear over time.
Key Features
One of the key design aspects I focused on was versatility and maneuverability:
- Removable Wheel Chuck: The wheel chuck is easy to detach, which makes the lift table compact enough to store under my trailer when it’s not in use.
- Wheels for Easy Movement: I added wheels to the base of the lift table, allowing it to be maneuvered around the workshop effortlessly. This also helps with storage, especially if you’re tight on space.
- Dimensions: The top working area is 2400mm x 700mm, big enough for bigger motorcycles. The maximum height of the table is 890mm and all collapsed with the wheel chuck removed it measures only 210mm in height.
Tips and Lessons Learned
If you’re considering building a motorcycle lift, here are a few insights I gained:
- Consider Stronger Steel Profiles: If you plan to lift heavier bikes or just want extra rigidity, go for steel profiles with a 4-5mm wall thickness. It’ll add stability and minimize flex.
- Hydraulic and Pneumatic Setup: Using a hydraulic cylinder with a pneumatic pump is highly recommended. It takes away the manual effort and ensures a smooth lift, making the build much more user-friendly.
Build Dimensions and Video
You can check out the full build process in the video below, where I walk through each step, from cutting and welding to the hydraulic installation and finishing touches. For those interested in the dimensions, I’ve added detailed photos showing each measurement to make it easier if you want to replicate the design.
Conclusion
Building this motorcycle lift was a rewarding project that saves time on bike maintenance and makes my workspace more efficient. It’s not only functional but also cost-effective compared to purchasing a commercial lift. Give it a try if you’re into DIY projects!


One Response